
This article explains how to install FreePBX 17 on Ubuntu 24.04 to manage Asterisk 22 PBX system.
FreePBX is an open-source graphical user interface that manages Asterisk, a robust open-source framework for building communication applications. It enables users to easily configure and manage their Asterisk-based phone systems without requiring extensive programming skills.
This user-friendly tool allows individuals to quickly set up extensions, voicemail, call routing, and other features through a visual dashboard, even without extensive programming skills.
Using FreePBX on Ubuntu streamlines the management of an Asterisk-based system and offers robust functionality and flexibility to meet various communication needs.
Install Asterisk PBX
FreePBX isn’t a PBX system. It is a tool to help you manage your Asterisk PBX system.
The first thing you’ll need to do is install the Asterisk PBX system. The post below shows you how to do that.
How to install Asterisk PBX on Ubuntu Linux
After installing Asterisk, proceed to the following steps to install and configure FreePBX.
Install Apache
FreePBX requires a web server. This post will install and use the Apache web server to run FreePBX.
To do that, open the Ubuntu terminal and run the commands below to install the Apache web server.
sudo apt update
sudo apt install apache2
After installing Apache, you can use the following commands to start, stop, and enable the Apache web server to start when your server boots up automatically.
sudo systemctl stop apache2
sudo systemctl start apache2
sudo systemctl enable apache2
You can verify that the Apache web server is operational by opening your web browser and navigating to the server’s localhost or IP address.

When you see the Apache2 Default Page, it means the Apache HTTP server is successfully installed.
Additional help on installing Apache on Ubuntu is in the link below.
How to install Apache on Ubuntu
Install the MariaDB database server on Ubuntu
The next component required to run FreePBX is a database server. This post will install and use the MariaDB database server.
To install and use the MariaDB database server, use the instructions below.
Open the Ubuntu terminal and run the commands below to install the MariaDB database server.
sudo apt update
sudo apt install mariadb-server
After installing the MariaDB database server, use the commands below to stop, start, and enable the server to start automatically on boot.
sudo systemctl stop mariadb
sudo systemctl start mariadb
sudo systemctl enable mariadb
Run the following commands to validate and test if the MariaDB database server is installed successfully.
sudo mariadb
After executing the commands, you will be logged into the MariaDB console, displaying a message similar to the one below.
Welcome to the MariaDB monitor.  Commands end with ; or g.
Your MariaDB connection id is 32
Server version: 10.11.2-MariaDB-1 Ubuntu 23.04

Copyright (c) 2000, 2018, Oracle, MariaDB Corporation Ab and others.

Type 'help;' or 'h' for help. Type 'c' to clear the current input statement.

MariaDB [(none)]>
The message tells you that the server is installed successfully.
By default, MariaDB on Ubuntu uses the UNIX auth_socket plugin for security. To allow the root user to use mysql_native_password, use the steps below.
You’ll need a MariaDB root account to set up FreePBX later.
First, log on to the database server.
sudo mariadb
Then, update the root account to use mysql_native_password.
ALTER USER 'root'@'localhost' IDENTIFIED VIA mysql_native_password USING PASSWORD('TypeRootPasswordHere');Finally, save your changes and exit.
FLUSH PRIVILEGES;
exit;
Install PHP and Related Modules
The last component you will need to run FreePBX is PHP. The FreePBX application is PHP-based and supports the latest versions of PHP.
Then, run the commands below to install the latest PHP version.
sudo apt install php libapache2-mod-php php-intl php-mysql php-curl php-cli php-zip php-xml php-gd php-common php-mbstring php-xmlrpc php-bcmath php-json php-sqlite3 php-soap php-zip php-ldap php-imap php-cas
Additional help on installing PHP
How to install PHP on Ubuntu Linux
Install Nodejs
After installing the server mentioned above, run the commands below to add the Node.js 22 repository to Ubuntu.
sudo apt install curl dirmngr apt-transport-https lsb-release ca-certificates
curl -sL https://deb.nodesource.com/setup_22.x | sudo bash
Then, run the commands below to install Nodejs.
sudo apt-get install gcc g++ make
sudo apt install nodejs
Install FreePBX
At this stage, ensure you have everything prepared for FreePBX. For this tutorial, we’ll be installing FreePBX version 17.
Run the command below to download and extract FreePBX files.
cd /tmp
wget http://mirror.freepbx.org/modules/packages/freepbx/freepbx-17.0-latest.tgz
tar xfz freepbx-17.0-latest.tgz
Then, please change it to the extracted folder and install FreePBX.
cd freepbx
sudo ./start_asterisk start
sudo ./install -n --dbuser root --dbpass TypeDatabaseRootPasswordHere
If you get an error,
Error!
Unable to read /etc/asterisk/asterisk.conf or it was missing a directories section
run the commands below to resolve:
sudo cp /etc/asterisk/asterisk.conf.old /etc/asterisk/asterisk.conf
If you also get an error:
‘asterisk’ user…bash: line 0: cd: /home/asterisk/: No such file or directory
Run the commands below to resolve:
sudo mkhomedir_helper asterisk
When you have resolved all the errors above, try the installation again.
After installing, you should get a similar message as shown below:
Finished generating default configurations
You have successfully installed FreePBX
Next, change Apache service runner from www-data to Asterisk user. To do that, run the command below to open the [envvars] file.
sudo nano /etc/apache2/envvars
Then, change the highlighted lines and replace the user with Asterisk.
# Since there is no sane way to get the parsed apache2 config in scripts, some
# settings are defined via environment variables and then used in apache2ctl,
# /etc/init.d/apache2, /etc/logrotate.d/apache2, etc.
export APACHE_RUN_USER=asterisk
export APACHE_RUN_GROUP=asterisk
Save the file and exit.
Also, add the www-data user to the asterisk group and restart the Apache service.
sudo a2enmod rewrite
sudo usermod -aG www-data asterisk
sudo systemctl restart apache2
Now, go and access the FreePBX portal. If you get a blank page, restart your computer and try again.
http://localhost/admin
Create your administrator account.
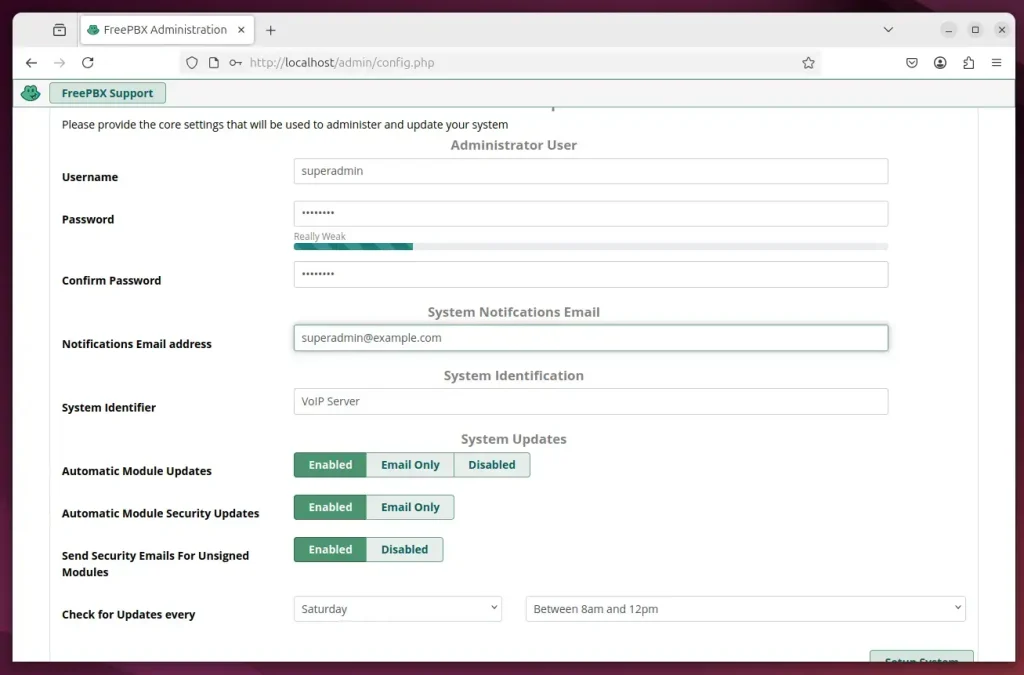
Setup, login, and start building your PBX
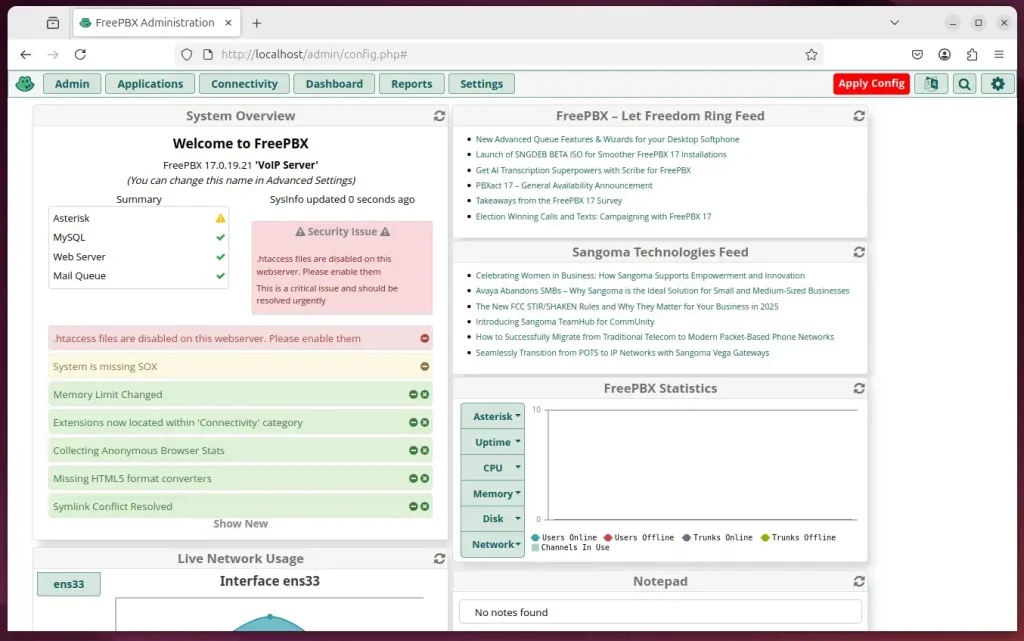
That should do it!
Conclusion:
In summary, installing FreePBX 17 on Ubuntu 24.04 to manage your Asterisk 22 PBX system consists of several key steps:
- Install Asterisk: Set up the Asterisk PBX system before integrating FreePBX.
- Set Up Apache: Install and configure the Apache web server to host the FreePBX interface.
- Install MariaDB: Deploy the MariaDB database server to manage FreePBX data storage.
- Install PHP: Ensure you have the required PHP version and extensions for FreePBX to function correctly.
- Add Node.js: Include Node.js as part of your server environment for web application functionalities.
- Download and Install FreePBX: Retrieve the latest version and complete the installation process.
- Configure Permissions: Adjust Apache settings to run under the Asterisk user for proper access.
- Access FreePBX: Finally, navigate to the FreePBX portal, create your administrator account, and start managing your PBX system.
These steps will help you set up a fully functional Asterisk-based phone system using FreePBX on Ubuntu.
Leave a Reply